I purchased a used Peg Perego high chair for $15 a few months ago. Everything works fine, except the seat cushion was all ripped-up. I pondered what to do as a new seat cushion costs around $50.....hmmmm, instead I bought a plastic tablecloth and attempted to make my own.
I traced the cushion onto the front side of the tablecloth and left an extra inch for some wiggle room. The last thing I did was add the rick-rack to make it look like a custom cover. I must say this is probably my best sewing remodel EVER!
Where our classically eclectic, crafty, nature loving homeschool tries to stay on track...
Showing posts with label sewing. Show all posts
Monday, June 27, 2011
Monday, June 20, 2011
Easy Sewing For Baby
Our little bundle is due in less than two weeks and we are so excited to meet her. My nesting started with organizing, then cooking, and now crafting. Here are some cute and simple projects that I made for our new baby.
I can't wait to share some photos of our new baby when she arrives!
Linked to:
![]() |
| I used out-grown tights to "baby legs" for a little crawler. |
![]() |
| This is my favorite project, but it took me 3 out of 5 onesies to get it right. I think this skirted onesie is super cute and the directions can be found over at Prudent Baby. |
![]() |
| I used thick cloth diapers to make these homemade burp clothes. Just pick a piece of fabric and embellish with ribbon. |
![]() |
| Every baby needs a cute homemade taggie blanket. Just sew the fabric like a blanket, but insert 2 inch pieces of folded ribbon on three sides. |
![]() |
| My first crocheted blanket. |
![]() | |
| I was surprised how easy these bibs were to make. You can use this simple pattern found here. |
Linked to:
Monday, April 11, 2011
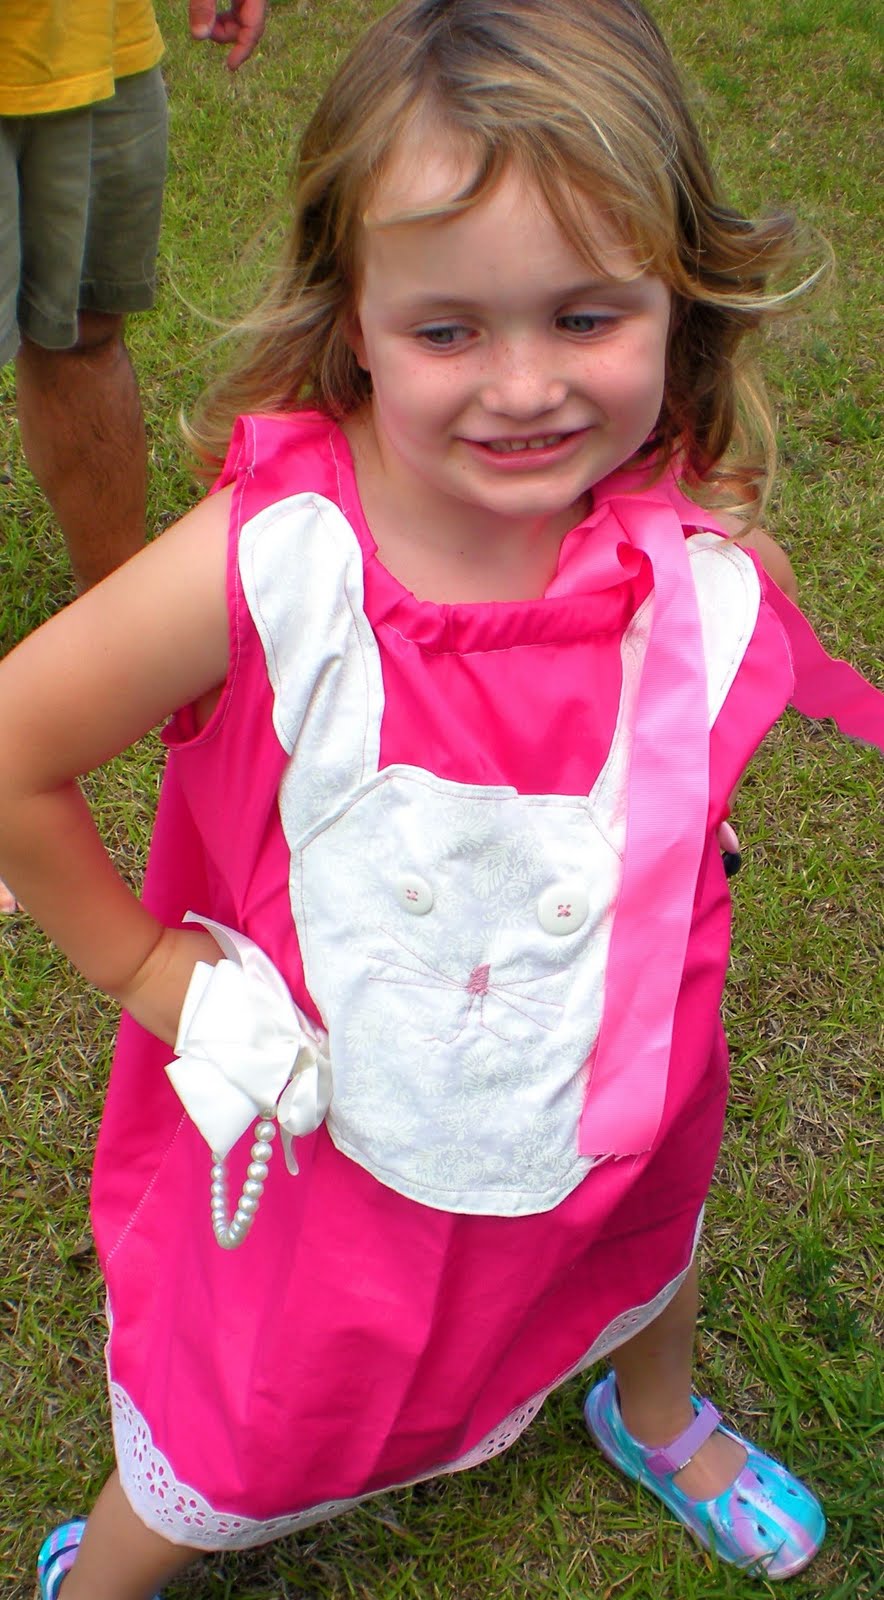
Easter Pillowcase Dresses
Here is my first attempt at making a pillowcase dresses. Olive was happy to model my new creation.
I added a little bunny on Jem's dress and it turned out cute.
Here is a great tutorial from Prudent Baby. I think my nesting starts with more crafting because my sewing machine has been working over time. What have you been creating?
Linked to:
Monday, September 6, 2010
Homemade Doll Sling Tutorial
Every child needs a cute doll sling for their special baby and they are simple to make.
Instructions:
Step 1: Cut one yard of fabric in half lengthwise. Fold the half lengthwise with like sides together (meaning the colorful fabric sides should be touching). I was able to make 2 slings with 1 yard of fabric.
Step 2: Sew the open (long) side together, you'll be making a tub. Both ends of the tube should remain open.
Step 3: Slip the fabric around your child and take note on what length the sling should be. Slip one open end into the other open end. You may wish to trim excess fabric at one end. Sew across with a zig-zag stitch and close the sling.
Step 4: Slip the doll sling over your child, pull the fabric apart, and place your child's doll inside.
View from the back.
Olive said she was able to get her baby to sleep a lot faster with her new sling. I hope your child enjoys this cute project as much as my girls.
This post is linked to: Handmade Holiday
Instructions:
Step 1: Cut one yard of fabric in half lengthwise. Fold the half lengthwise with like sides together (meaning the colorful fabric sides should be touching). I was able to make 2 slings with 1 yard of fabric.
Step 2: Sew the open (long) side together, you'll be making a tub. Both ends of the tube should remain open.
Step 3: Slip the fabric around your child and take note on what length the sling should be. Slip one open end into the other open end. You may wish to trim excess fabric at one end. Sew across with a zig-zag stitch and close the sling.
Step 4: Slip the doll sling over your child, pull the fabric apart, and place your child's doll inside.
View from the back.
Olive said she was able to get her baby to sleep a lot faster with her new sling. I hope your child enjoys this cute project as much as my girls.
This post is linked to: Handmade Holiday
Tuesday, July 20, 2010
Old Jeans Turned Into A Purse!
My daughter out-grew a pair of jeans and we made them into a little purse for her to carry around. It actually turned out really cute. I used old play jeans, but can't wait to recycle some cute disney ones when she's done with them too.
Directions:
Step one: Cut jeans straight across at the crotch.
Step two: Turn inside out and sew across
Step three: I lined the inside and sewed it into the bottom and around the top. Line it by using a different fabric and basically sew a square about the same size, by leave the top open and slide it into the jeans.
Step four: Make a handle- either use ribbon and sew it on or use left over leg material (I made a braid with it) and sew it into the sides.
Step five: Add your own creative touch!
Directions:
Step one: Cut jeans straight across at the crotch.
Step two: Turn inside out and sew across
Step three: I lined the inside and sewed it into the bottom and around the top. Line it by using a different fabric and basically sew a square about the same size, by leave the top open and slide it into the jeans.
Step four: Make a handle- either use ribbon and sew it on or use left over leg material (I made a braid with it) and sew it into the sides.
Step five: Add your own creative touch!
Tuesday, June 22, 2010
Easy Sew Party Shirt.
I forgot to post this cute shirt that I surprised Jem with on her third birthday. I used scrap fabric and ironed on stitch-wich to the back of it to make the fabric stiffer. Then I cut out a number 3 and sewed it onto one of Jem's old shirts....that now looks like new. I added a little embellishment to the top and there you have it, a cute little party shirt!
Wednesday, March 10, 2010
Whip It UP Wednesday- Super Hero Capes
I whipped up these cool super hero capes for the girls over the weekend. Olive always says she has "word" power and Jem has "flying" power. They love running around in these capes and I think they are super cute.
Even if you're not handy with the sewing machine they are pretty easy to make. For a no sew craft you could always use felt for the cape and strong glue to adhere the felt emblem.
For a good tutorial check out Puking Pastelles here.
Even if you're not handy with the sewing machine they are pretty easy to make. For a no sew craft you could always use felt for the cape and strong glue to adhere the felt emblem.
For a good tutorial check out Puking Pastelles here.
Subscribe to:
Posts (Atom)